Notes about Rega RP3 Upgrades
I purchased Rega RP3 turntable maybe 10 years ago new (and also Rega TT PSU external power supply). I was not using it but decided to put it back and meanwhile I thought I may improve some things. I combined some of the upgrades below so I did all modifications in maybe 3 steps. Some below like preamplifier, SUT etc. are not a mod of Rega RP3, but I included them for the completeness of the story.
1. Preamplifier
I have already sold my phono preamplifier before, so I needed a new one. I had an MM cartridge but already planning to try MC cartridge, so preferably it should be an MM/MC preamplifier. By luck, I have come across a Teac PE-505 in the local second hand market. It looked pretty perfect for my needs, maybe only missing point is that XLR input is supported only for MC input. So I bought it.
2. MC Cartridge
I changed my Rega Exact MM cartridge to a Denon 301mk2 LOMC cartridge. I looked at a few other cartridges, particularly to Dynavector DV-10X5 MKII, but Denon was cheaper (almost half price of Dynavector) and particularly well recieved, so I purchased the Denon. This is my first MC cartridge, and I very much like it. However I realized, being low output, the noise of phono preamplifier is more important (than when using MM cartridge). Also, it seems to be not possible to source this in Europe (is it only sold in Japan?), so I purchased it new but from eBay from a seller in Hong Kong.
3. Cleaning and Anti-Static
As I was not using my turntable, my LP library was staying somewhere for a long time. They definitely needed an initial cleaning and some maintenance (changing the covers etc.).
For wet cleaning, I purchased a Spin-Clean kit, which is pretty fine for cleaning in small batches and probably for small LP libraries.
I also purchased two types of record covers, first from inakustik, second is from SPINCARE. They are both anti-static and made from HDPE, but SPINCARE is thinner and actually I like it more. There is nothing wrong with inakustik one, but it is thicker, sometimes it is not easy to put it back inside the LP cover.
Static electricity is the main problem with LPs that attracts dust or fine particles. An ultimate solution would be to decrease static electricity on the LPs and around the environment. One way is to have an ionizing air blower. Because I also have other ESD protection tools, I decided to get this unit and found one second hand. Basically I use it on LPs (blowing ionizing air to LPs), before putting the LP to playback. This should effectively neutralize any electrostatic charge on the LP and not attract charged particles.
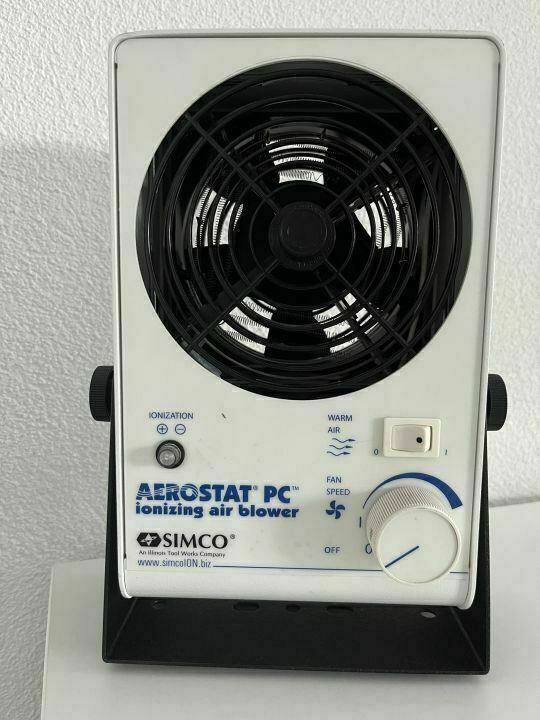
Ionizing Air Blower
4. Tonearm Rewire
I rewired the tonearm with Incognito Cardas Rewire Kit. It was mostly to separate the ground connection, because Rega turntables connect ground to the shield connection of one channel (I forgot which one). You have to take apart almost everything in the turntable, so I would not call this easy but if you are willing to make mistakes, it is not difficult. It is also a nice learning experience, I can easily work on the turntable now. The most difficult thing while doing this rewire for me was to take out the metal part holding the counterweight, this is needed to solder the ground connection. I probably damaged this part while taking out but I had a replacement from the new counterweight (below) so that was OK. Origin Live also have an upgrade kit for Rega, and they also have a more extensive documentation which might be helpful.
I was not careful and I missed a point regarding the cable in this kit. If I realized this before, I may not have done the “Cable” upgrade I will describe below, so let me tell this. Because it had RCA plugs, I thought the cable is unbalanced, in the sense, + was connected to center and - was connected to the shield of the cable, and ground is provided with the extra cable as usual in all turntables. However, actually the cable is a symmetric cable, in the sense, it has 2 conductors, and the RCA connector center and ring is connected to inside conductor in this cable. The shield is connected to ground internally at the connection point. So basically this is almost a balanced cable (almost because it has RCA plugs).
5. Subplatter and Counterweight
I have installed Groovetracer subplatter and counterweight. This upgrade is not difficult, and both Groovetracer products are extremely well made. If you are looking for a subplatter upgrade, I definitely recommend Groovetracer. I did not purchase the Groovetracer platter upgrade (yet), because I like the (look of) original Rega glass platter. The most recommended upgrade for Rega turntables is I think the subplatter.
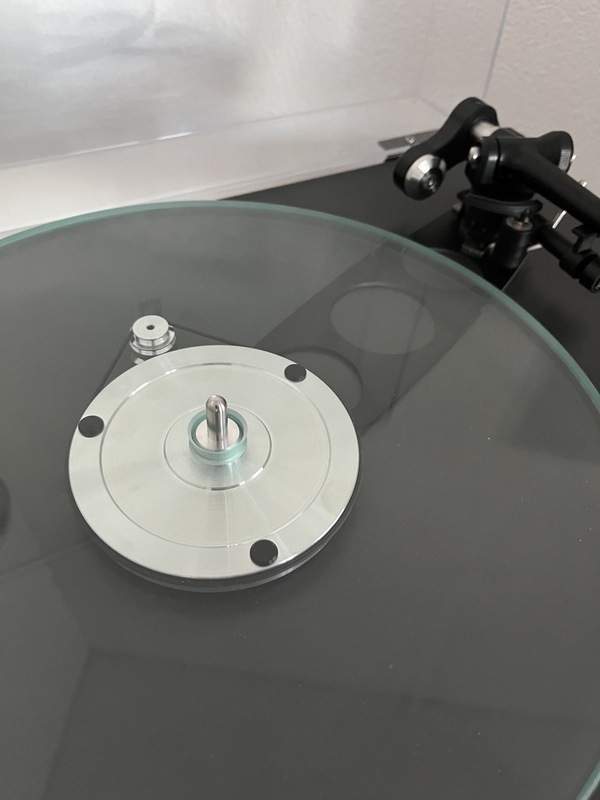
Subplatter and Counterweight
The motor looks like it is mounted on the plinth above, but it is actually mounted on the silent base. It does not look very different.
6. Tonearm Height
I installed a 2mm spacer to the tone arm (visible on picture above) and Origin Live 1mm platter mat. Because Denon cartridge is approx. 3mm taller, this gives pretty much perfect height correction. Does it matter, I do not know, but if turntable is made for Rega cartridges, and if I can correct this height for Denon cartridge, why not, that is my thinking.
7. Isolation and Belt
I installed SRM Tech Rega Silent Base, so this physically separates the motor from the plinth. This was a difficult decision, because on RP3 the motor is attached to the plinth with an adhesive pad, removing the motor means damaging this adhesive pad. It is not fully irreversible, another adhesive pad might be found, but still a major decision I think.
The main reason I decided to do this upgrade is it also functions as an isolation platform, and usually expensive turntables have their motor and plinth not physically connected like what this upgrade offers. Also, it provides extra space for the cable connection which I like (because of the next upgrade I describe below). I had a worry, maybe it could be difficult to adjust the speed by changing the location of the motor, I did not know how sensitive it would be (and actually I asked this to SRM Tech, and I am told it would not be a problem).
At the end, I made the upgrade and I am happy with it with many positive points. I like the isolation platform with spikes, it also looks nice. The most difficult part of this upgrade for me is to remove the motor from the plinth. The adhesive pad I mentioned above is pretty strong, so it was pretty difficult as I was also trying to be careful to not damage the motor or the plinth. After removal, it was very easy to attach the motor to the provided motor vibration absorber, and I did no particular adjustment, but do not forget to remove the adhesive pad pieces from the motor as they may touch the plinth.
The main issue with the upgrade is because now motor is connected to something else, if needed, the turntable needs to be moved together with the silent base. The PCB is also uncovered now, because there is only 24V, it is not dangerous, and it is behind so that is fine but the motor cables goes to motor which stays on silent base but power cables go to power on/off switch on plinth, so even if you take out the belt, you cannot take the plinth up alone.
I was using the same belt (white) since I purchased the turntable so I also decided to change it. I got a Rega Reference EBLT drive belt and with the new motor installation and the belt, the speed was pretty good; 33.21 RPM and 0.13% wow & flutter.

Rega RP3 on Silent Base
8. Cable
I trimmed the rewired cable (yes, I could have purchased only a tone arm rewire kit and save some money but I decided to this later also by mistake because I thought the original cable is an unbalanced cable), I purchased Cardas M DIN R plug and soldered the tone arm cables to this plug at the plinth. This finally gives me a connector at the plinth so I can change the cable independent of the tone arm cable. Then I soldered approx. 1m Mogami Neglex W2534 Star Quad cable to Cardas M DIN plug and terminated it with Neutrix NC3MXX-EMC XLR connectors. This gives me a proper XLR balanced output from the turntable. The Star Quad cable has more capacitance than other cables, but it is still around 100pF and I guess it is not that important for MC cartridge. I do like to have a Star Quad as a phono cable since it has better magnetic immunity. Because two conductors in the Star Quad cable have to be soldered to one pin (so 4 in total, R+, R-, L+, L-), it is a bit difficult, also because M DIN R plug is pretty small, but it is doable, and also some electrical isolation tape might help. Because W2534 cable diameter is not very small, it is not possible to use the housing of the connector, so I only used some electrical tape -I hesitated to use thermoplastic-. The extra space created under the plinth with Silent Base is enough but still it is a bit tight. Instead of M DIN, R DIN 90 degrees plug might work better but it is like 3x more expensive than M DIN.
Summary after 1-8
Overall, it was fun doing all these upgrades. I cannot comment about sound quality benefits of individual upgrades as I made some of them together and I did not listen enough the individual changes, but I am pretty happy with the sound quality at the moment. Because I am only listening with headphones, and almost always at night or early in the morning, I am very sensitive to noise, so the only issue I would like to improve is the background noise level. It is not much, not bugging when the music is playing, but it can be easily heard when the volume is increased a little bit.
9. Step-Up Transformer (Change: 2022-11-08)
I decided to try a SUT with MC as a passive device (transformer) has certain unique benefits. There are some alternatives, some expensive some very expensive, usually nothing very cheap. I possibility for me is finding a quite famous, well received, (naturally) used Denon AU-320 SUT from I think 70s since I also own a Denon MC cartridge which is a very good matching. Albeit being from 70s, this transformer has a very good spec and it is triple shielded. It is also not rare, a few can be easily find online.
So I got one and although cosmetically outside it looks OK, being very old, the inside of the unit was a little bit of mess because of dust and disintegration of the foam isolation used around the transformer. I cleaned the unit and put some foam tape around the transformer. It seems to be working OK.
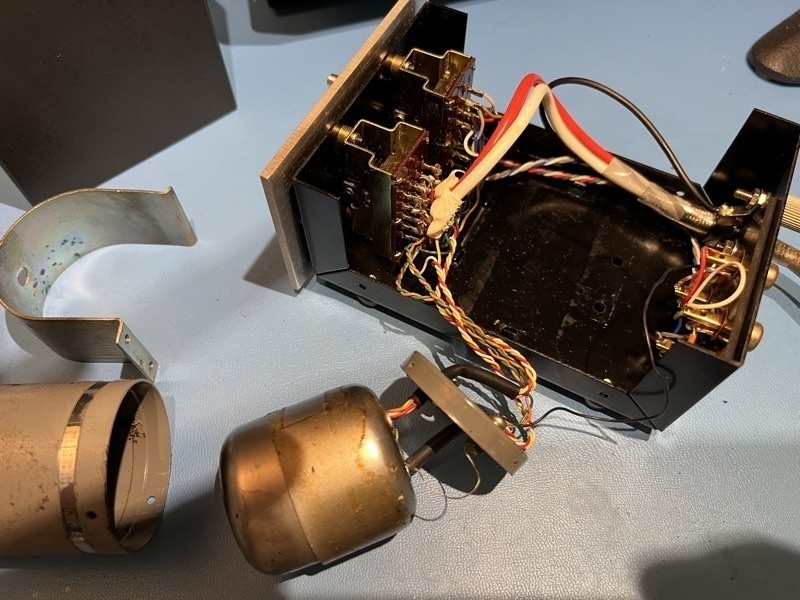
Denon AU-320 while cleaning, the metal cylinder is the transformer housing and shield
Because SUT only has RCA inputs, I also decided to change (and also shorten) the cable I am using. So I made another cable (~60cm) using a Cardas M DIN R at one end and Amphenol RCA plugs on other end using a Mogami Neglex W2549 Balanced Microphone Cable. The reason I use this cable is W2549 has a very very low capacitance (11 pF/m conductor-conductor). I used both of the conductors for the signal and connected the shield to the ground point of DIN connector. Denon AU-320 output cable is integrated to the SUT, so I am using that without any modification.
After it is ready, I tried it with an album I am familiar with. I think, and this is expected, with SUT, there is less background noise, but I think I prefer the MC input of the preamplifier rather than SUT. Not sure if this is because of SUT or because of the MM input of the preamplifier. It feels there is less bass with SUT, and preamplifier MC input has more foot-tapping qualities, and they are probably related.
This work is licensed under a Creative Commons Attribution-NonCommercial-ShareAlike 4.0 International License.