Making a high quality and modular pinhole lens
Introduction
Use of a pinhole, as in camera obscura, has a long history. I think it is also a bit strange to call something a pinhole lens, since a lens normally consists of (glass) optical elements (objectives), whereas pinhole is just an empty hole. It might be better to call the whole system a pinhole camera rather than calling it a pinhole lens but because it is mounted and used like a lens for the purpose of this post, I will continue calling it as a pinhole lens.

Illustration of the camera obscura principle (from wikipedia)
I always want to try a pinhole lens on a digital camera, and I think the best product I could find at that time (maybe it still is) was thingyfy Pinhole Pro. They even have a model where you can change the pinhole diameter like you change the aperture on a normal camera lens.
On the other hand, one of my favorite companies is Thorlabs, and not surprisingly they also produce Pinholes. So I thought, why not to try to make a pinhole lens myself ?

Thorlabs snacks box that comes with every order :)
There are plenty of articles on the internet about building pinhole lenses. However, this post is about building a high quality and modular one using commercial building blocks, and this is the main difference, so do not expect it is going to be cheap, but it will not be too expensive either. Also, I will try to explain what I learned about how to determine pinhole size.
I have a Fuji X APS-C and a Sony E full-frame system. Although I plan to use this lens only with Fuji, I want to be sure I can use it with Sony as well, so I keep this in my mind when designing it.
There are a few interesting characteristics of a pinhole for imaging:
- A very large/infinite depth of field.
- No lens distortion because there is no optical (glass) element.
- Not important for normal photography but it works in all wavelengths (e.g. x-ray)
Probably the main disadvantage is, because the pinhole is very small comparing to apertures used in the normal lenses, the need to use very long exposures.
I am mainly using Thorlabs products in this post. I am not working for or affiliated with Thorlabs, and this post is not sponsored by Thorlabs. I purchased all the items mentioned in this post. I will write the approx. prices of the items from Thorlabs when I purchased them.
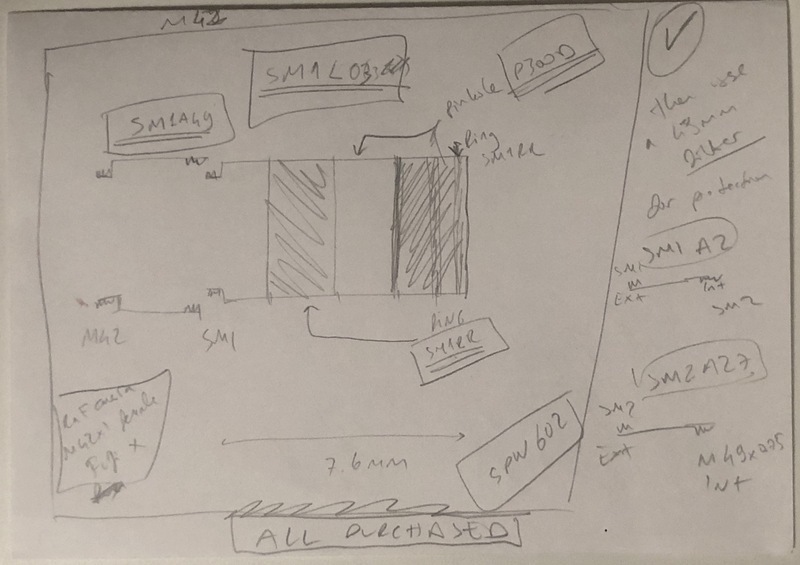
My back-of-the-paper design
Requirements
It should be like a real lens, built from high quality/machined parts, nothing experimental like trying to punch a hole on a metal (which might work, but I dont want to do that).
It should have a standard mount on the camera side. Because there are adapters from many standards to original camera mounts (in my case Fuji X and Sony E). I decided to use M42 for this purpose.
It should have a standard mount on the object (filter) side. Because pinhole is a sensitive element and there is literally nothing from pinhole to the sensor (meaning there is nothing from outside to sensor as well), I would like to put a protection window somewhere. So object side should have a mount for which it is easy to find a protection filter.
It should support both APS-C and full-frame sensors.
Pinhole diameter
The most important parameter of a pinhole lens is the diameter of the pinhole, which increases the image sharpness as it gets smaller, but also increases the side effects of diffraction. So the exact answer would rather be an optimum according to some criteria, there is no single perfect answer.
"... Now, as the aperture is gradually narrowed, we will trace
the effect upon the definition of the wires parallel to it.
The definition is improving; and now it looks tolerably good.
But I will go on, and you will see that the definition will get
bad again. ... Too small an aperture, then, is as bad as one
which is too large; and if the aperture is sufficiently small,
the image is no worse without a lens than with one."

(Lord Rayleigh. Some applications of photography. Nature, Vol.44 (1133), 1891.
An approximate rule is said to have f-number f/100 or less (remember it is very common for normal lenses to have minimum f-number around f/22). f-number N is calculated from focal length f and diameter of pinhole D as:
$N = \dfrac{f}{D}$
Focal length is the distance from pinhole to the image (sensor). Here it becomes important the flange focal distance (FFD) of the lens mount. For Fuji X, it is 17.7mm, and for Sony E, it is 18mm. By luck (or not luck, since both systems are mirrorless), they are very close. Taking Fuji as example and N as 100:
$\dfrac{17.7mm}{100} = 0.177mm$
So we are talking about a diameter around 0.2mm. If you look at the technical details of thingyfy Pinhole Pro S, they decided to use 0.14mm for MFT, X and E mounts (mirrorless systems). The FFD of MFT is also in the same range, it is 19.25mm. We cannot exactly compute the f-number because I am not sure where the pinhole stays (how far it is from the camera mounting flange) in this product, but assuming it is at the same level as the mounting flange, f-number is, f/126 for X, f/128 for E, f/137 for MFT.
According to wikipedia, Petzval gives the following formula to determine the optimum pinhole diameter for the sharpest image:
$D = 2\sqrt{f \cdot \lambda}$
$\lambda$ can be taken as 550nm as the middle point of visible range. For Fuji X (assuming the pinhole is exactly at the mount flange), D would be:
$D = 2\sqrt{17.7mm \cdot 550nm}$
$D = 0.197mm$
However, according to Petzval (1869) and Rayleigh (1891), Petzval gives the following formula (when object is at far comparing to focal length):
$D = \sqrt{2 \cdot f \cdot \lambda}$
According to this formula:
$D = 2 \cdot r = \sqrt{0.5 \cdot 17.7mm \cdot 550nm}$
$D = 0.139mm$
Rayleigh basically says the recent (late 1890s) developments about understanding the effects of diffraction by Lommel gives a better answer. Rayleigh (1891) writes the suitable radius of the pinhole is:
$r = \sqrt{f \cdot \lambda}$
So this is effectively the same formula written in wikipedia, but it seems it is not from Petzval but from Rayleigh and/or Lommel.
Rayleigh also gives a formula depending on the object distance (o below) and focal length (f):
$D = \sqrt{3.6 \cdot \lambda \cdot \dfrac{o \cdot f}{o + f}}$
It is important to note that pinhole size could be quite different for landscape ($o \gg f$) and macro ($o = f$) photography.
Kjell Carlsson’s very nice presentation shows that resolution is one thing but what we judge an image as sharp depends on the constrast as well. So even if one system has higher resolution, if its MTF (measuring contrast over different resolutions) is low in low and medium frequencies (resolutions), then it looks as if it is less sharp. This means rather than the formula above, calculating where diffraction and geometrical optics give the same pinhole size would be more appropriate if purpose is normal photography, which is:
$r = 0.78 \cdot \sqrt{\lambda \cdot f}$
For the same focal length above, this gives:
$r = 0.78 \cdot \sqrt{550nm \cdot 17.7mm}$
$r = 0.076mm$
$D = 2 \cdot r = 0.152mm$
I think it is probable that thingyfy also calculates the optimum pinhole size according to this formula (or according to a similar criteria) since they also use D=0.14mm.
It seems like 0.15-0.2mm pinhole diameter is a good place to start. However, all these calculations assume the flange focal distance of the camera mount, but this is of course where the actual pinhole stays. Because I am planning to use a certain adapter, the location of pinhole is approximately 25mm in my case. So this results:
$r = 0.78 \cdot \sqrt{550nm \cdot 25mm}$
$r = 0.091mm$
$D = 2 \cdot r = 0.182mm$
Thorlabs have pinholes with diameter for example 0.1mm, 0.15mm, 0.2mm and 0.3mm. I am using P200D having 0.2mm pinhole. It costs 65 EUR. This is the most expensive single item in this project. Going from reverse now, if D=0.2mm, focal distance should be $f = 29mm$. So if I move the pinhole to 29mm, this is the perfect arragement for this pinhole and this formula. It might sound difficult to adjust this but it is actually not that hard with the retaining rings in the lens tube. So in the end, I am using P200D at focal distance of approx. 29mm. This means it has an f-number of f/145.
Filter and camera threading
I already had a few 49mm filters, so I decided to use M49 x 0.75 as the filter thread.
The camera threading could be many things, I decided to use M42 x 1.0 because of availability of Thorlabs adapter to M42.
This process is a bit circular, since I thought about these but I also checked if Thorlabs have adapters for these threads, and they have. SM1A49 converts SM1 to M42 x 1.0. Because the pinhole is on $\varnothing 1$ (1 inch) tube, the threads are SM1, however there is no SM1 to M49 adapter (for the filter), but it can be done with two adapters, one to convert SM1 to SM2, SM1A2 and one to convert SM2 to M49, SM2A27.
All three (SM1 to M42, SM1 to SM2, SM2 to M49) of the adapters cost 74 EUR. The last two are actually optional and only for mounting the protection filter. Another possibility, which I also tried, is to use a glass window, e.g. WG11010 instead of camera filter. In this case, there is no need for the last two adapters and no need for the protection filter. Unfortunately the glass window is not cheap (75 EUR). So if you want to build something similar, it is up to you which way to go.
Lens Tube
Naturally there is a need for a (lens) tube to hold the pinhole. For $\varnothing 1$, the smallest tube is 7.6mm and the next one is 12.7mm. I was not sure if it would fit 7.6mm so I bought both of them, and it did not fit to 7.6mm, so I used 12.7mm one, SM1L05. The tube comes with one retaining ring but one more retaining ring, SM1RR is needed to hold the pinhole. The tube and the extra retaining ring cost 16 EUR.
Spanner wrench
It might be done in other ways but it is always difficult to work on lenses without a spanner wrench. Since I am also thinking to do things in the future, I also bought a spanner wrench to work with $\varnothing 1$, SPW602. This costs 25 EUR.
Order and build
Thorlabs is extremely quick to send all the parts, I received them the next day from Germany (to Switzerland). The only problem -and actually it is a very reasonable cost for international shipment- is the cost of the shipment if you order only a few items (UPS Standard shipment is I think around 35 EUR), so you might want to batch if you want other things. Since Switzerland is not in EU, I also paid the customs fee etc. but there is no surprise there and process is very seamless with UPS.
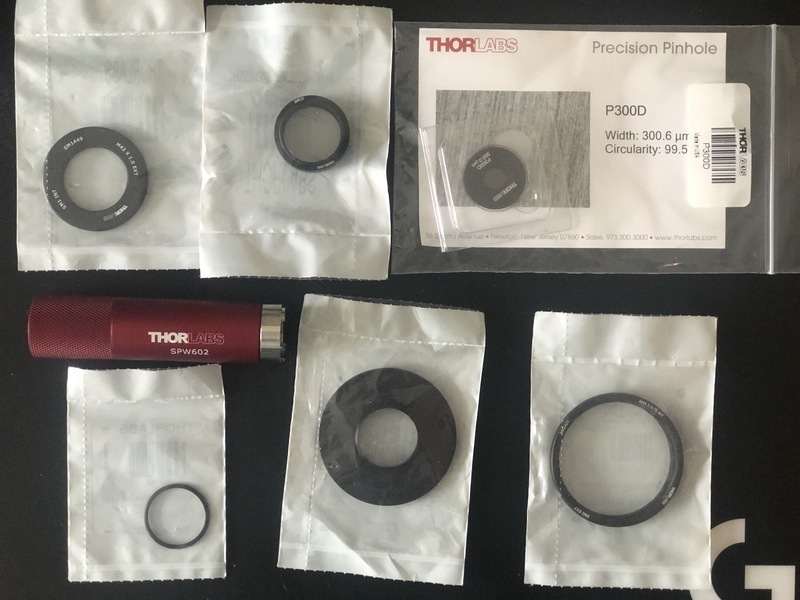
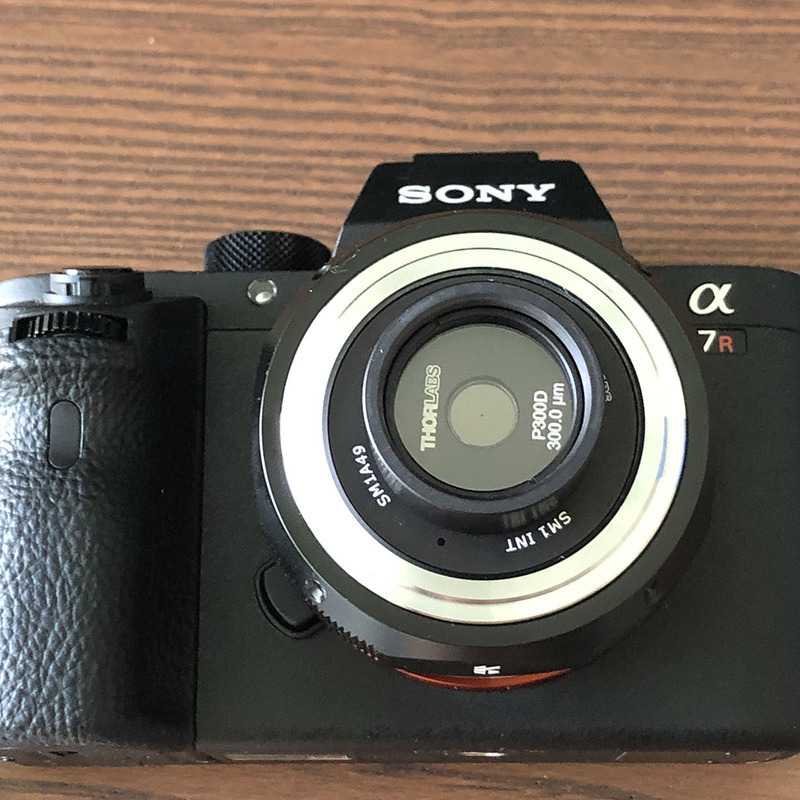
Some of the pieces from the order (P300D here, but I also bought P200D which I use in this post)
The build was much simpler than I thought. All the parts are very high quality and easy to mount. Buying spanner wrench was a very good idea, it would be unnecessarily difficult to do this otherwise.
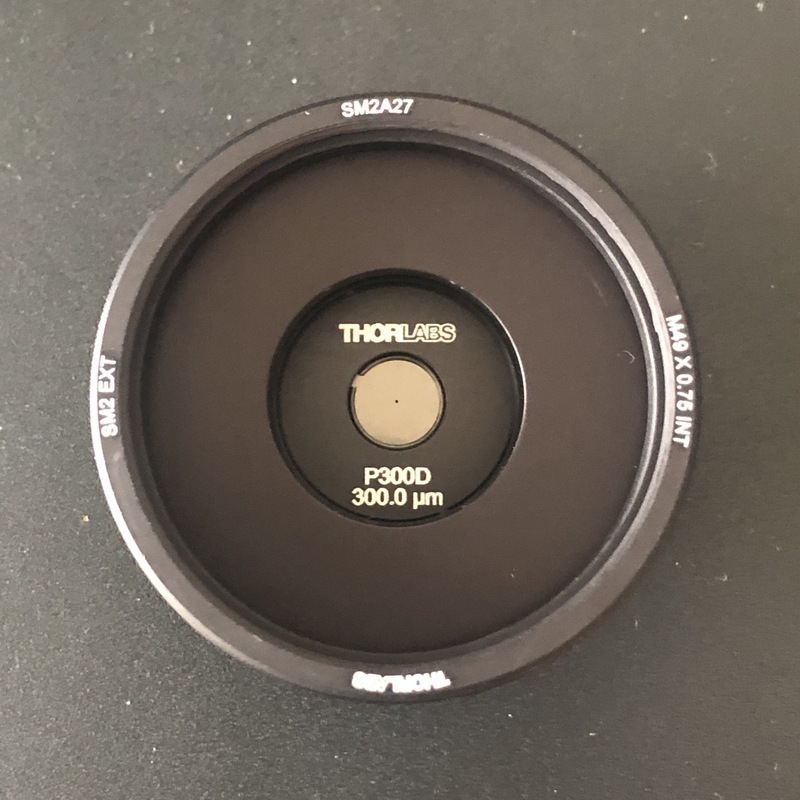
Pinhole lens filter side (P300D is shown here, but I used P200D for this post)
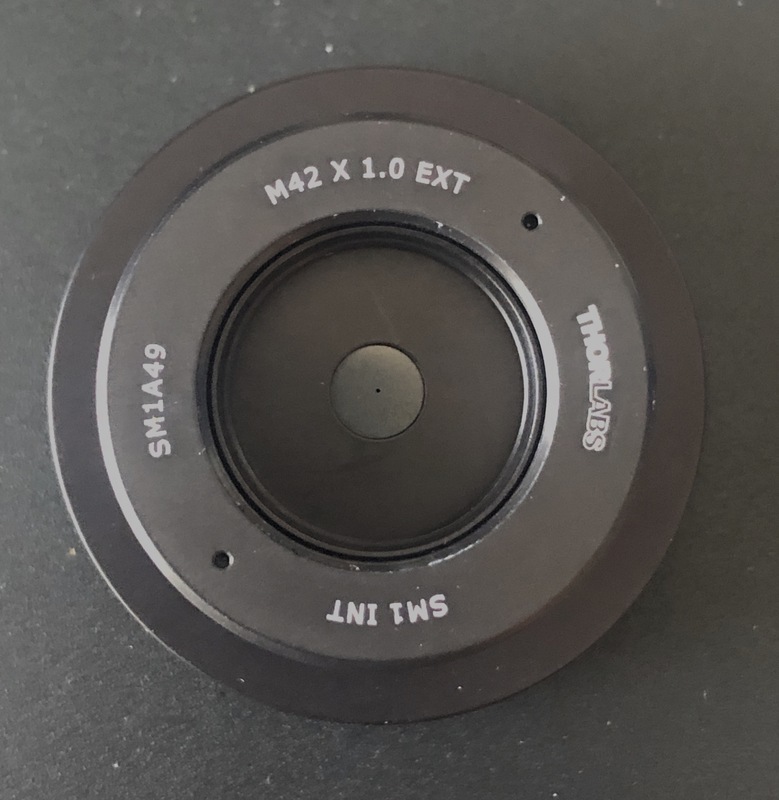
Pinhole lens camera side
Protection filter
I am using a Hoya UV(0) filter just because I already had one.
Camera adapter
I am using a RafCamera M42x1 to Fujifilm X-mount adapter. This costs around 22 EUR. Be aware that this is not a normal M42 adapter, it does not have the flange focal distance of M42, so it cannot be used for normal M42 lenses, but I do not need the actual M42 flange focal distance, so this actually works better for me. (A funny anectode is I purchased this from eBay and it is shipped from Russia, and I think because of all COVID-19 situation, it took a very long time almost 6 weeks to arrive by post).
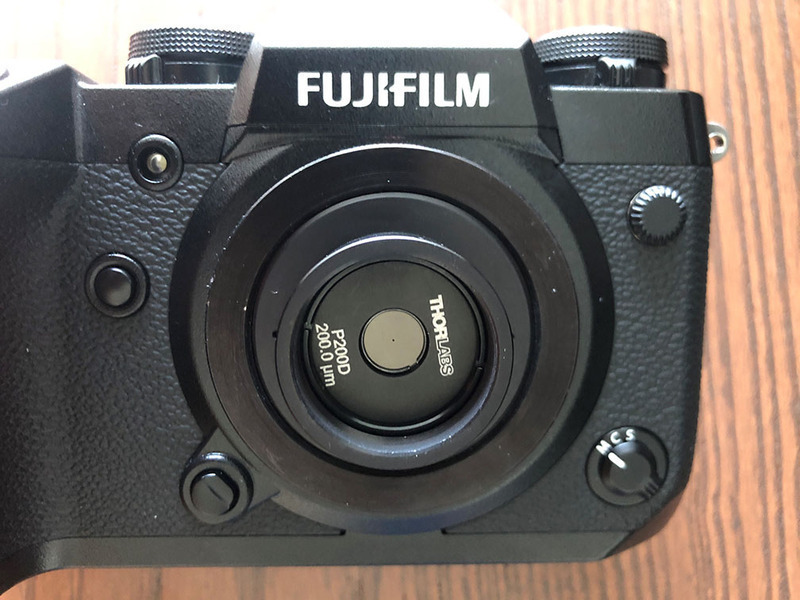
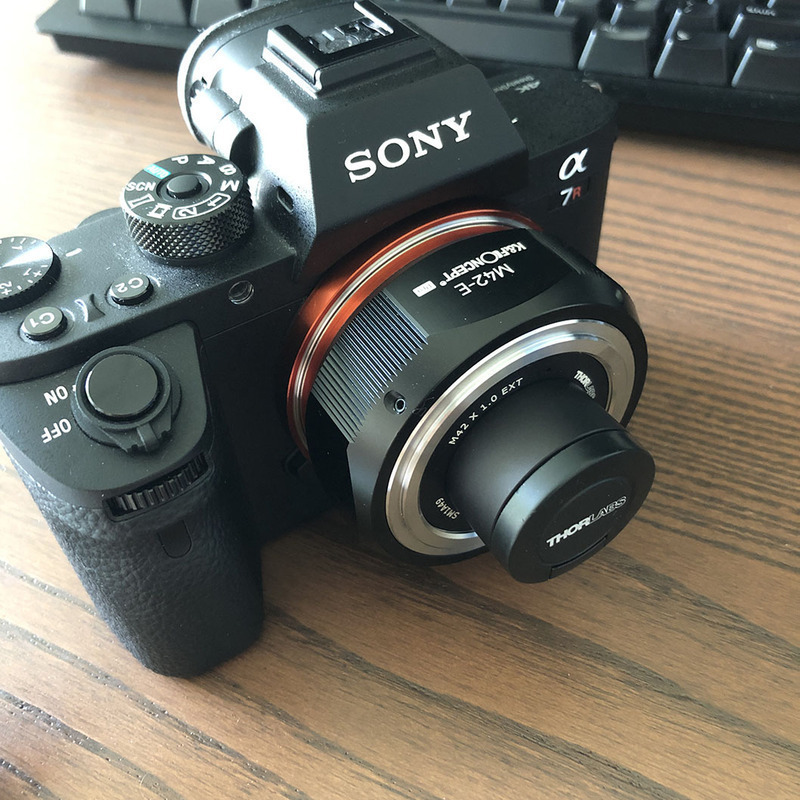
Pinhole lens mounted on the camera
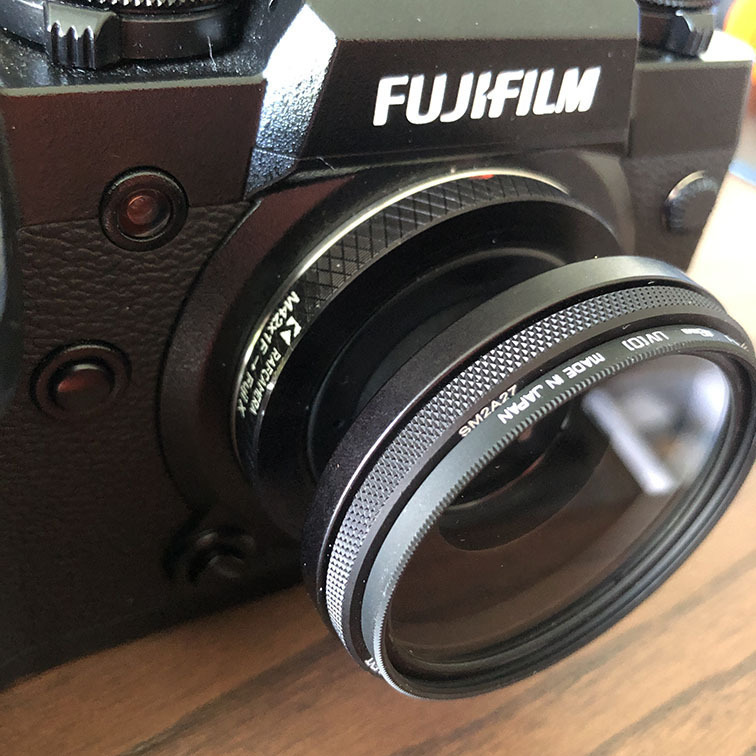
Pinhole lens mounted on the camera
The sample images below is taken with this lens having P200D.
Cost
Excluding the Hoya filter, the camera adapter and the Thorlabs spanner wrench, the total cost is approx. 155 EUR. This is almost double the price of thingyfy Pinhole Pro S. However, I now have a modular system which I can change the parts as I want and experiment with many other things. For example, I can use different pinholes, which I can mount in different locations (because I have the lens tube), which I can mount both on Fuji X and Sony E using the adapters.
Angle of view and image circle
After I build the lens - I should have thought this before -, I wondered if $\varnothing 1$ tube or filter threading (49mm) affect anything, and also what the image circle of the lens is.
All calculations I make here are approximate.
So basically going backwards from the sensor size, for Fuji X, the angle of view is approx. 60 degrees. At the end of $\varnothing 1$ tube (1 inch=25.4mm), it only needs 7mm, at the filter (49mm) it needs 18mm. So there is no problem at all. For Sony E, the angle of view is approx. 80 degrees. At the end of $\varnothing 1$ tube, it only needs 10mm, and at the filter, it needs 27mm. Again, there is no problem. So nothing on the lens tube blocks anything.
For image circle, going back from filter (49mm), angle of view is approx. 115 degrees. For 26mm focal length, it covers a diagonal of 80mm (diagonal of full-frame is 43.2mm). Going back from the end of $\varnothing 1$ tube, angle of view is approx. 128 degrees. So limiting factor will be the filter size but it is already larger than what is required for full-frame.
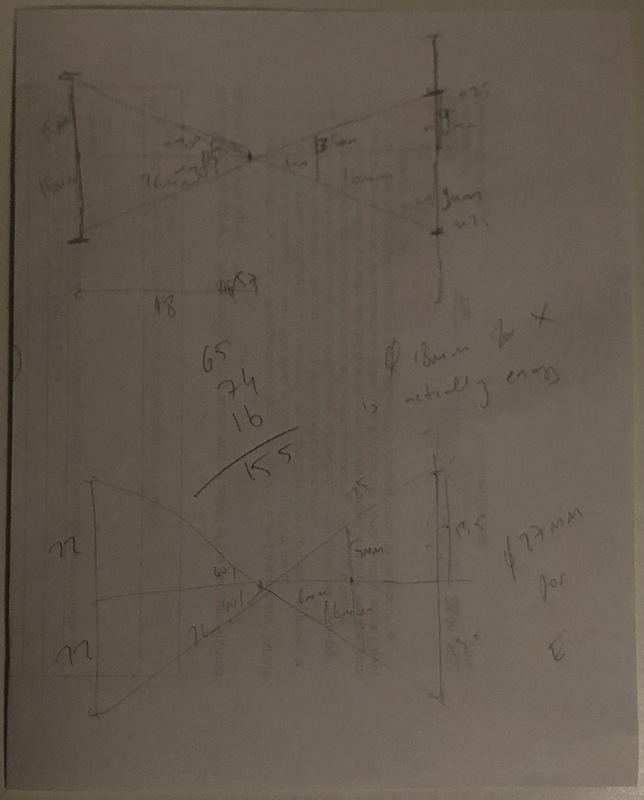
My back-of-the-paper calculations for angle of view and image circle
Another Version
Since it is built from modular pieces, I also build another one to use with my Sony camera. To be honest, I am not very happy with the Raf camera adapter (esp. the E-mount version), so I am using a K&F adapter in this one, and I am not using the M49 protection filter, but Thorlabs N-BK7 uncoated window (WG11010 I mentioned above) (and also SM1 snap-on dust cap from Thorlabs). I believe the total cost is similar to above not including the protection filter (but including the window). Because I am using the K&F adapter, the focal length is longer than above, approx. 46mm. So I am using the 0.3mm pinhole (P300D) in this version, so it means this is f/153, not very different than the one above.
Resources
- Lord Rayleigh. On pin-hole photography. Philosophical Magazine Series 5, 31:189, 87-99, 1891.
- Lord Rayleigh. Some applications of photography. Nature, Vol. 44 (1133), 1891.
- M. Young. Pinhole Optics. Applied Optics, Vol. 10 (12), 1971.
- Klaus D. Mielenz. On the Diffraction Limit for Lensless Imaging. J Res Natl Inst Stand Technol, Vol. 104 (5), 1999.
- J. Petzval. On the Camera Obscura. Philosophical Magazine and Journal of Science, 1859.
- Kjell Carlsson. The Pinhole Camera Revisited. 2004. link
- Pinhole camera@wikipedia
- Flange focal distance@wikipedia
- H.H. Nasse. How to Read MTF Curves. Camera Lens News, 2008. link
- H.H. Nasse. How to Read MTF curves? Part II. Camera Lens News, 2009. link
Sample Images
To my surprise, at daytime and high ISO, you can take handheld photos particularly if you have sensor based image stabilization. That is actually why I wanted to try the second version of the lens using full-frame Sony camera, since it has a better ISO performance.
The images below are taken with Fuji X-H1 using a 0.2mm pinhole at approx. 29mm.
1/2 seconds, ISO 200, using tripod (IBIS disabled) 1/8 seconds, ISO 3200, handheld 1/15 seconds, ISO 1600, handheld 1/8 seconds, ISO 1600, handheld 1/15 seconds, ISO 1600, handheld 1/8 seconds, ISO 1600, handheld

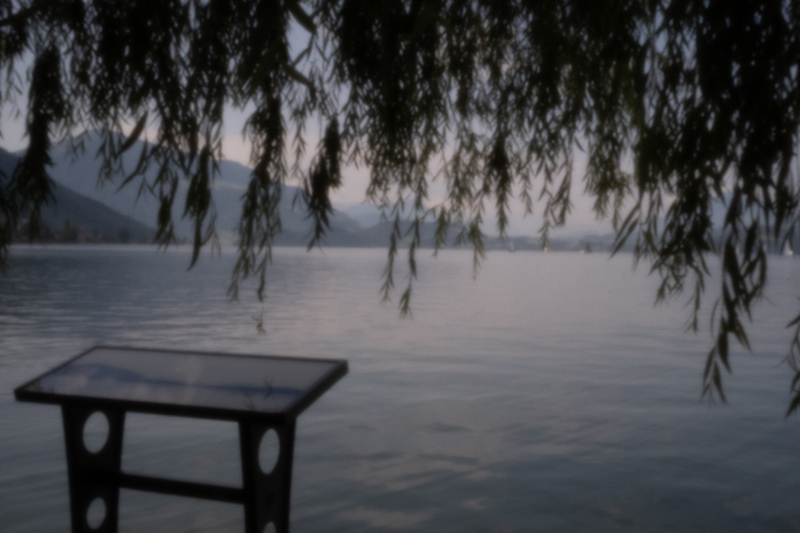


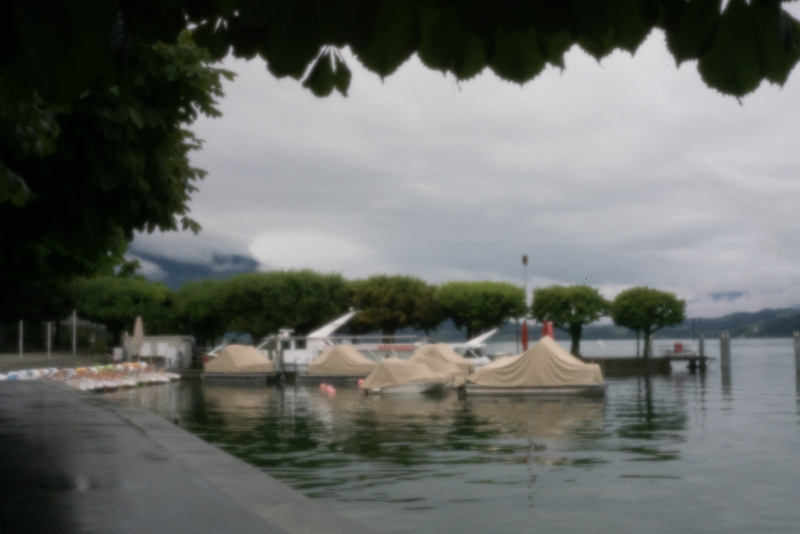
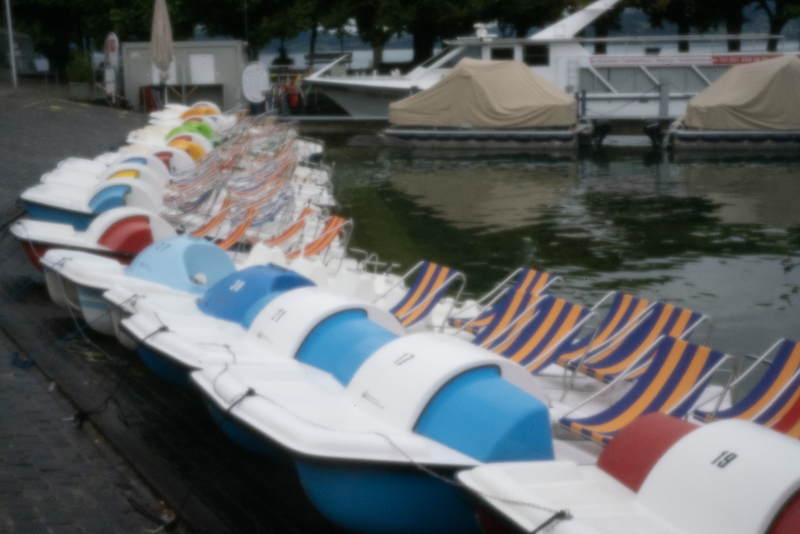
The images below are taken with Sony A7R2 using a 0.3mm pinhole at approx. 46mm. All images are taken handheld with SteadyShot enabled.
1/80 seconds, ISO 6400 1/50 seconds, ISO 6400 1/50 seconds, ISO 6400 1/20 seconds, ISO 6400

This work is licensed under a Creative Commons Attribution-NonCommercial-ShareAlike 4.0 International License.