AlphaServer and Tru64 UNIX in 2023
Introduction
I have used many different UNIX computers in the late 90s and early 2000s, including SunOS/Solaris, HP-UX and SGI Irix, but I have only very briefly used DEC/Compaq systems and Digital/Tru64 UNIX. Because of an application that I would like to run natively on Digital/Tru64 Unix, I have acquired an AlphaServer DS10 and this is a short post of my experience with purchasing, installing and using this Alpha computer which might also function as a short tutorial on how to use this hardware. Although it is called a “Server”, it is like a large desktop personal computer.
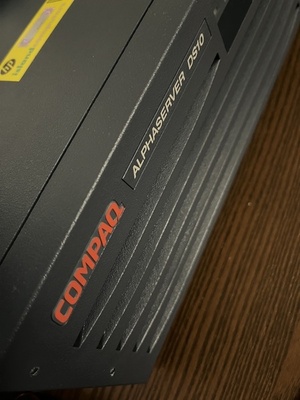
Compaq AlphaServer DS10
If you do not know, Alpha (or Alpha AXP or DEC Alpha) is a CPU architecture developed by Digital Equipment Corporation (DEC). So an Alpha program cannot run on Intel processors (or ARM processors). Based on this architecture, there are many Alpha microprocessors produced by DEC that are used in many workstation and server computers.
DEC has been acquired by Compaq in 1998, and then Compaq is merged with HP in 2002, hence DEC products are rebranded at different times. The AlphaServer DS10 I have is branded as Compaq. DS10 is not an early model but also not from the latest Alpha computers, it is introduced in 1999. It is relatively easier to find in second hand market and possibly in a good condition and at a reasonable cost (but expect spending ~1K USD).
Naturally there are some emulators. I tried some and they work fine for running the operating system. However, the proper ones are not free, and I experienced difficulties with the programs. That is actually the reason I decided to purchase an actual hardware, an emulated system would be my first option.
As neither DEC, nor Compaq still operates, and HP does not sell or support these systems anymore, it might be difficult to find the documentation, however there are some sites keeping the documents as well as a mirror of relevant www or ftp sites.
Extra Requirements
In addition to the hardware and the operating system installation media etc., I use the following:
A null modem cable and serial port/COM interface (USB etc.). If there is a graphics card and PS/2 keyboard installed (which I dont have), they can also be used but a serial console access would be needed soon or later. The COM port on the server is female type, and this is an indication you will need a null modem cable. With a normal serial port interface (USB at one end, male RS232 connector on other end), the connection cannot be established and simple gender changer adapters are not enough. A null modem cable basically crosses TX and RX lines.
A CD-R writer and some number of blank CD-R disks. There is no support for USB disks, and the floppy diskette is even harder to find and use, so before setting up the network, CD-ROM is the only data transfer method. I used a new (Lite-on) external DVD writer (supporting CD-R also) and new blank (Verbatim) CD-R disks, and they work fine.
An RS232-Ethernet converter or bridge. As I plan to keep the computer away from my desktop, I need a way to access terminal/COM port over Ethernet. I have purchased a Waveshare RS232/485 to Ethernet Converter. This is the cheapest such product I could find and it works fine. One trick is to use the following command to access its TCP server (it does not work with Telnet):
stty raw -echo && nc <IP> <PORT> && stty sane.NFS Server. I also installed a Linux computer with NFS Server on the same network as the Alpha computer. I use this for the data transfer to and from the Alpha computer.
AlphaServer DS10 Hardware
After I decided to buy one, I checked eBay and there were a few alternative sellers. Because I have never worked with Alpha hardware before, and although it was a little more expensive, I have chosen a company specialized in Alpha which tests all the products before selling and hence gives a warranty also. After a week or so, the computer has arrived but it was giving an error at system boot, 6 beeps. This means either the main memory or the cache memory has an issue. So after some time with diagnosing the issue, the company has sent me a replacement mainboard and also an extra memory kit as it was not clear which one has the actual problem. The CPU is soldered to the mainboard, so when I say mainboard it should be understood as mainboard+CPU combination. I tried the replacement board, and it seems like the previous mainboard was the problem.
As I did not purchased a graphics card (and PS2 keyboard/mouse) since I was not planning to use it locally (but through a remote XDMCP session), the only way to access it was through the COM port which functions as serial terminal. The secret here is you need a null modem cable.
So after a few weeks, the AlphaServer DS10 was ready. It has these specs:
466MHz CPU: the other option is 600MHz (actually I think 617), I dont think it matters much if you are not doing something serious. It has 2MB L2 cache.
1GB ECC Memory: there are 4 DIMM slots, and memory is always installed in pairs (2 DIMMs). The minimum is I think 256 MB (2x128MB), the maximum is 2GB (4x512MB). I have 4x256GB, 2x 2x256GB memory kit. These are the original spare parts with Compaq or HP numbers.
120GB IDE HDD: DS10 has two onboard IDE (PATA) ports. The HDD I have is Seagate Barracuda 7200.7 (ST3120026A). I think there is a limitation of Alpha hardware or Digital/Tru64 UNIX for the maximum capacity, but 120GB works fine, it can be fully utilized. One reason I wanted to purchase a tested server is I was not sure what kind of IDE HDD it would support. This disk (Barracuda 7200.7) is a pretty new model for a PATA HDD, so I guess it would work with any PATA HDD.
48x IDE CDROM: It is a Hitachi-LG (GCR-8480B) CD-ROM drive.
1.44" diskette drive: As I do not plan using this, I actually unplugged its cables.
2x 10/100 Mbps Ethernet ports: I am using the first port for the network.
2x COM ports: COM1 is used as a terminal (and RMC, more about RMC later in this post).
1x Parallel port: I guess it is a printer port, I am not using it.
PS/2 keyboard/mouse ports: I am not using these.
USB ports: there are also two USB ports but these are documented as not supported on the technical summary.
Here is a photo of the mainboard (this is the faulty one I have):
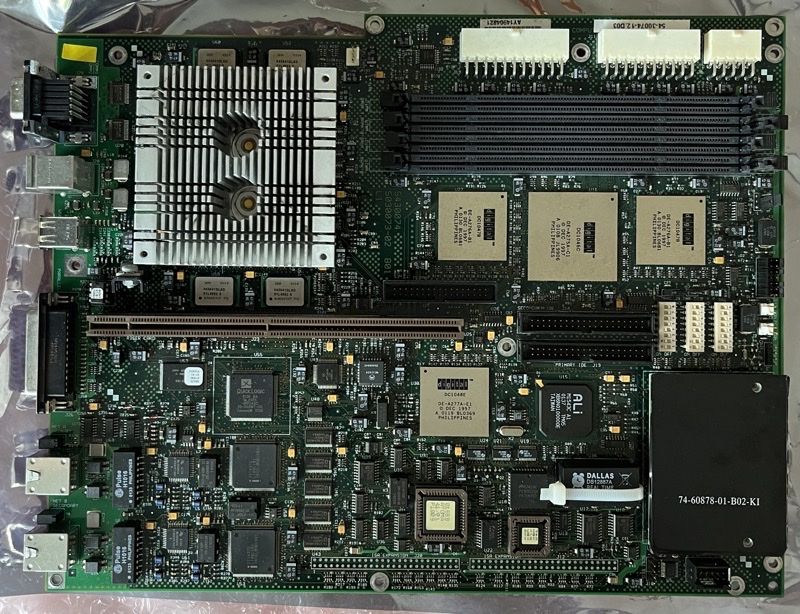
AlphaServer DS10 Mainboard
Here is a diagram from the technical summary document linked below:
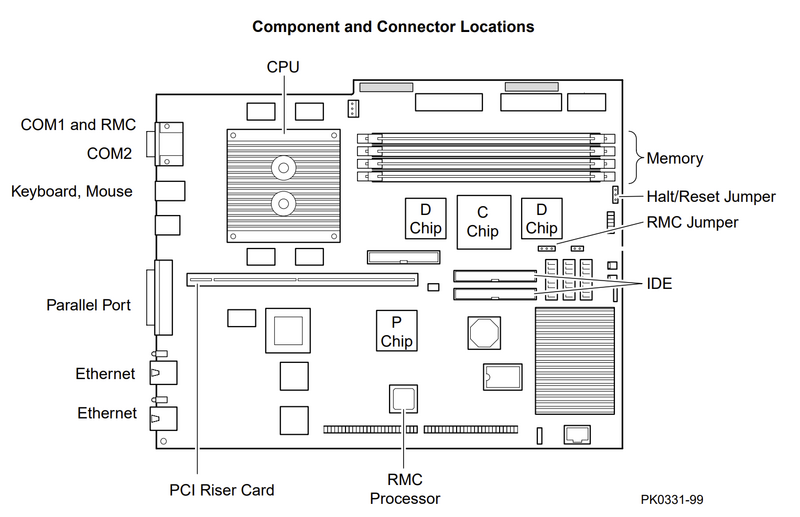
DS10 Component and Connector Locations
The large brown slot is for the PCI riser card, and with the riser card it provides 3x 64 bit PCI slots and 1x 32 bit PCI slot (PCI v2.1). All I/O interfaces other than Ethernet (including Serial, Parallel and PS/2 ports, Floppy and IDE ports) is controlled by an Acer Labs 1543C chip. Each ethernet port is controlled by a (Digital Semiconductor) Tulip 21143 chip.
The computer has 4 fans, one inside the power supply, one on top of the CPU heatsink and two in the front, one for the system/mainboard and one for the PCI slots. It is not very noisy but still noisy enough to not keep it next to my desk. There is also a speaker which gives particular beep sequence in case of a system hardware problem.
For detailed information, you can check AlphaServer DS10 Systems Technical Summary and AlphaServer DS10 QuickSpecs. It is possible these documents have different versions, I keep the ones that I find the most similar to the computer I have. The technical summary is a very well written overview of the system hardware. There is also a very brief AlphaServer DS10 User Reference Card.
SRM and RMC
SRM is the firmware (like a simple BIOS) of the hardware, and it has a command line interface and it can be accessed through the terminal/COM port (as far as I understand it can also be directed to graphics card if you have one). There is not too much to configure here, but it is the first thing that runs, which also boots the disk specified hence the operating system. There are a few important environment variables (options or flags) to set.
In addition to SRM, there is also Remote Management Console (RMC). SRM, as you expect, is only available when the computer processor is powered on. However, RMC is available as long as power cable is connected even if the processor is not powered on, it has its own microcontroller. It is like a very small SRM, where you can only check status, power the computer on and off etc., like the out-of-band management port of current servers, but it shares the terminal port/COM1. This is configurable but when connected to COM1, if you type ^]^]rmc (esc-esc-rmc), RMC prompt appears.
After the operating system booted, SRM or RMC is not available. However, if you are running UNIX or VMS, pressing the halt button on the front panel pauses the operating system and brings the SRM console. Also, when the operating system is halted (e.g. shutdown -h now), the system comes back to the SRM console (it does not automatically powered off). RMC is always available through the sequence (esc-esc-rmc) when SRM console is available.
Because it is a firmware, SRM (maybe also RMC) commands and options might be slightly different for each computer model. For AlphaServer DS10, it is documented in AlphaServer DS10 Console Reference. The firmware is upgradeable and the latest version for DS10 is 7.3-1. The AlphaServer DS10 I have purchased already had the latest firmware version so there was no need to upgrade it.
Because it is possible to run also Windows NT on Alpha computers, there is also something called AlphaBIOS, which I do not use.
Powering On
After connecting to COM1, and calling RMC by esc-esc-rmc, current status can be checked:
RMC>status
�0;1m
       PLATFORM STATUS
�0mFirmware Revision: V1.0
Server Power: OFF
RMC Halt:
RMC Power Control: OFF
Power Supply:
System Fans:     CPU Fan:
Temperature: 38.0�C�0m (warnings at 55.0�C, power-off at 60.0�C)
Escape Sequence: ^[^[RMC
Remote Access: Disabled
RMC Password: not set
Alert Enable: Disabled
Alert Pending: �0;1;5mYES�0m
Init String:
Dial String:
Alert String:
Com1_mode: SNOOP
Last Alert: �0;1mAC Loss�0m
Watchdog Timer: 60 seconds
Autoreboot: OFF
Logout Timer: 20 minutes
User String:

RMC>
As you see it has no power yet. Lets turn on the power:
RMC>power on

*** ERROR - failed to power on ***

RMC>
Returning to COM port
...
I dont know why it gives the error (maybe because I dont have the original power supply) but it actually powers the computer on. As you see RMC automatically quits, so the terminal connection is now the actual terminal. The output continues like this:
RMC>
Returning to COM port
*** keyboard not plugged in...
1024 Meg of system memory
probing hose 0, PCI
probing PCI-to-ISA bridge, bus 1
bus 0, slot 9 -- ewa -- DE500-BA Network Controller
bus 0, slot 11 -- ewb -- DE500-BA Network Controller
bus 0, slot 13 -- dqa -- Acer Labs M1543C IDE
bus 0, slot 13 -- dqb -- Acer Labs M1543C IDE
*** system serial number not set. use set sys_serial_num command.
initializing GCT/FRU at 3ff40000

ewa0: link up : Negotiated  100BaseTX: full duplex
Testing the System
Testing the Disks (read only)
Testing ew* devices.
System Temperature is 39 degrees C

AlphaServer DS10 466 MHz Console V7.3-1, Feb 27 2007 13:17:58
>>>
This is the SRM console prompt. Here, you can check the system configuration and display or set a number of environment variables, some of which are particularly important.
The system configuration can be seen with show config command:
>>>show config
                        AlphaServer DS10 466 MHz

SRM Console:    V7.3-1
PALcode:        OpenVMS PALcode V1.98-83, Tru64 UNIX PALcode V1.92-73

Processors
CPU 0           Alpha EV6 pass 2.3 466 MHz
                SROM Revision: V1.14.208
                Bcache size: 2 MB

Core Logic
Cchip           DECchip 21272-CA Rev 2
Dchip           DECchip 21272-DA Rev 2
Pchip 0         DECchip 21272-EA Rev 2

TIG             Rev 2.1
Arbiter         Rev 7.30 (0xfe)

MEMORY

Array #       Size     Base Addr
-------    ----------  ---------
   0         512 MB    000000000
   1         512 MB    020000000

Total Bad Pages = 0
Total Good Memory = 1024 MBytes


PCI Hose 00
     Bus 00  Slot 07: Acer Labs M1543C
                                                         Bridge to Bus 1, ISA
     Bus 00  Slot 09: DE500-BA Network Controller
                                   ewa0.0.0.9.0          08-00-2B-86-A2-F1
     Bus 00  Slot 11: DE500-BA Network Controller
                                   ewb0.0.0.11.0         08-00-2B-86-A2-AE
     Bus 00  Slot 13: Acer Labs M1543C IDE
                                   dqa.0.0.13.0
                                   dqa0.0.0.13.0          ST312002 2A
                                   dqb0.0.1.13.0          HL-DT-ST CD-ROM GCR-


ISA
Slot    Device  Name            Type         Enabled  BaseAddr  IRQ     DMA
0
        0       MOUSE           Embedded        Yes     60      12

        1       KBD             Embedded        Yes     60      1

        2       COM1            Embedded        Yes     3f8     4

        3       COM2            Embedded        Yes     2f8     3

        4       LPT1            Embedded        Yes     3bc     7

        5       FLOPPY          Embedded        Yes     3f0     6       2
PALcode above means Privileged Architecture Library code. This is specific for operating system and hardware platform and it contains operating system subroutines for context switching, interrupts, exceptions and memory management. (source: 21264 EV6 Hardware Reference Manual)
You can see every information about the system. The memory is reported as arrays (array=bank), each array consists of two DIMMs. There are also specific commands like show memory and show device which shows similar information.
The device names for the drives depend on the type of the device. IDE drives start with dq (dqa0 is HDD and dqb0 is CD-ROM above), Floppy is dva (which can be seen with show device).
show command displays the environment variables and there are many, show <variable> shows only one, it is also possible to use wildcards like show boot* to show all variables starting with boot.
What SRM does after the system powered on (or rebooted) is decided based on the value of auto_action variable.
haltmeans it will stop at SRM console, meaning the operating system will not be booted automatically.bootmeans the operating system will be automatically booted after powering on (or reboot), but it is going to stop at SRM console if operating system experiences a system fault.restartmeans the operating system will be automatically booted in any case.
Another important variable is os_type:
>>>show os_type
os_type                 UNIX
os_type can be NT, VMS, OpenVMS, OSF, UNIX. If it is NT, SRM console automatically loads AlphaBIOS. The value naturally depends on what you want to install, as I use Tru64 UNIX, I set it to UNIX.
The other important variable is ewb0_mode (there is also ewb1_mode as there are two ethernet ports). This is the mode (10 or 100Mbps, half or full duplex etc.) of ethernet port.
>>>show ewa0_mode
ewa0_mode               Auto-Negotiate
I set it to auto, to auto-negotiate the speed.
I have installed the operating system on disk dqa, and bootdef_dev and boot_osflags are automatically set during operating system installation.
>>>show boot*
boot_dev                dqa0.0.0.13.0
boot_file
boot_osflags            A
boot_reset              OFF
bootbios
bootdef_dev             dqa0.0.0.13.0
booted_dev
booted_file
booted_osflags
boot_osflags=A means it is going to boot normal multi-user mode in Tru64 UNIX.
boot_reset indicates if a reset should happen after a reboot is requested from the operating system (e.g. shutdown -r now).
When the auto_action is halt, then you can manually initiate boot here by boot command. Lets try:
>>>boot
AlphaServer DS10 466 MHz Console V7.3-1, Feb 27 2007 13:17:58

CPU 0 booting

(boot dqa0.0.0.13.0 -flags A)
block 0 of dqa0.0.0.13.0 is a valid boot block
reading 13 blocks from dqa0.0.0.13.0
bootstrap code read in
base = 200000, image_start = 0, image_bytes = 1a00(6656)
initializing HWRPB at 2000
initializing page table at 3ff2a000
initializing machine state
setting affinity to the primary CPU
jumping to bootstrap code

Digital UNIX boot - Thu Jan 11 14:49:49 EST 2001

Loading vmunix ...
...
and it continues showing the Tru64 UNIX output until the login prompt appears:
...
The system is ready.

Digital UNIX Version V4.0 (HOSTNAME) console

login:
After the operating system is installed, I think auto_action is changed to boot by the operating system installer, so it automatically boots after the installation.
Tru64 UNIX 4.0F
I do not know the licensing requirements of Tru64 UNIX at the moment. You have to figure this out yourself.
Now it is time to install the operating system. The original UNIX operating system of DEC computers was DEC OSF/1 AXP (launched in 1993). This operating system is renamed to Digital UNIX with the release of version 3.2 (in 1995). Then it is renamed to Tru64 UNIX when Compaq has acquired DEC, with the release of version 4.0F (in 1999). The latest version is 5.1B which is launched in 2002 and the support is ended at the end of 2012.
Normally, I would install the latest, 5.1B. However, because of the software I want to use, it would be better to install 4.x. Digital Unix 4.0D is the first version with Year 2000 compliance. I tried 4.0E but it seems DS10 is supported from from 4.0F (4.0E did not boot), so I installed Tru64 UNIX 4.0F. The latest in 4.x is 4.0G.
Before starting the install, I recommend to download the documentation set. It is quite extensive and covering everything from installation to administration to the use of desktop. Naturally the version of documentation set should be similar to the operating system you will install. I could not find the documentation set of 4.0F, but I have for 4.0E.
The installation is very simple, and I go with the default options as much as possible. However, the default disk layout does not use all the space of HDD, so I did a custom layout and used UFS partition h for /usr (without a separate /var partition). The disk partitioning is a bit strange, it is not as flexible as we have now, there are fixed number of partitions named a,b,c,d,e,f,g and h (8 in total). They can overlap and you can change the start/end/size of them. The default is similar to the image below. The easiest way to use a disk is, to use a for root /, b for swap (I have changed the swap partition to g after installation, because it is larger) and h for /usr and dont use a separate partition for /var. This is what I did.
Tru64 UNIX Partitions from 4.0E documentation
Different than Linux, the default home directories are under /usr/users, so /home will not grow in size. The default home directory for root user is /, you might want to change this, I changed it to /usr/users/root.
It is not needed but I installed all the packages since I have lots of disk space.
After installing the OS, running setup on console brings the main configuration application. I configured the network, BIND client and NFS server and client. Then I installed the Patch Kit 5. Installing patch kit actually takes more time than installing the OS. I also copied the contents of Freeware Executables CD to /freeware, this includes familiar programs like bash.
There is no SSH server, so if you want to install one, either you need to find a binary or compile it from the sources, which is what I did as I described here. Both for SSH/telnet and for XDMCP, you need to modify /etc/securettys file if you want to login as root.
Remote Login via XDMCP
It is quite simple to use another X server to remote login to the system via XDMCP.
Here is the X11 login screen (dtlogin) using Xmanager on Windows 11:
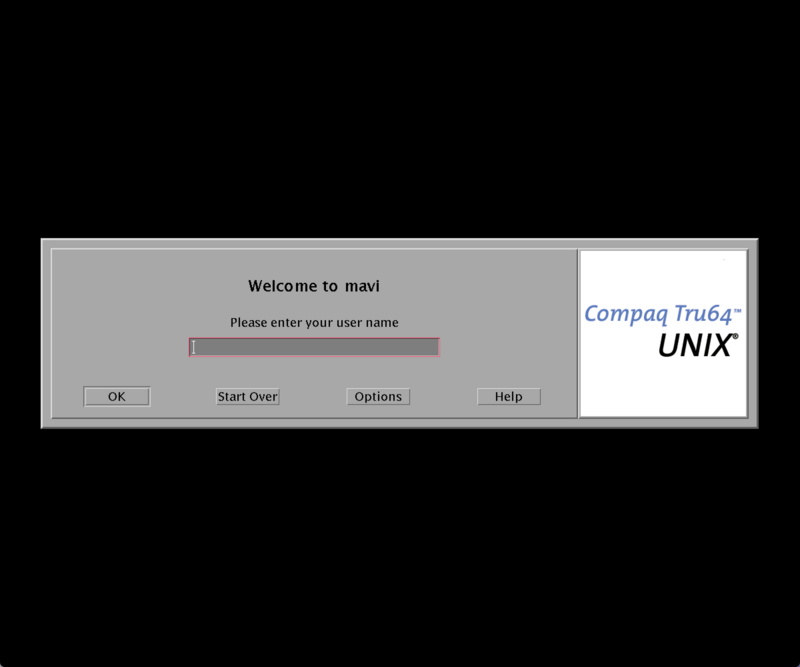
Tru64 UNIX 4.0F X11 Login Screen
mavi (meaning blue in Turkish) is its hostname.
You might want to copy the fonts to your X server.
Final Notes
After getting used to, it is pretty simple to use both the Alpha hardware and Tru64 UNIX. As it is 20+ years old, it is simpler than the current state of Linux and the documentation is really comprehensive so it is quite easy to figure things out. The most problematic issue is it does not have the software we are very much used to, like bash, ssh, vim etc. Some of these software can be found or compiled from the source.
Update on 2023-06-03
Since I started using DS10, I was looking ways to change its HDD. Other than on my NAS because it needs high capacity, I am not using HDDs anymore. I almost only use NVMe SSDs or SATA SSDs if NVMe is not possible. Naturally it is not possible to use NVMe with DS10 but SATA is also not possible, it only has PATA IDE port. So there are a few options to use solid state storage. To be on the safe side, I did not want to use an adapter converting protocols (SATA->PATA) , so the storage unit has to be PATA IDE. So the options are either a PATA SSD or a CF card. The adapters of CF card actually looks nice but to be able to run a computer on CF card, I think I need industrial ones and they are not cheap. So I decided to go with PATA SSD. There are not many options, I bought a Transcend PSD330 32GB, a mechanical adapter to be able to mount it as a 3.5" drive and because it has 44-pin small-size connector, an adapter to change this to 40-pin and 4-pin molex power connector.
I installed it to the cage with the floppy drive, close to DIMMs. DS10 recognizes it and I installed Tru64 5.1B. Until now it works fine.
The 44-pin IDE to 40-pin IDE adapter is a bit low quality, I could not find something better yet.
This work is licensed under a Creative Commons Attribution-NonCommercial-ShareAlike 4.0 International License.